


If JoomGallery is newly installed, no example image is pre-installed!
You can start using the top menu.
You can open the image upload form using the top menu and the button: "New".
This function uploads a single image to your server according to the specified category. If specified in the configuration, the title can be automatically set to the same as the file name or taken from the metadata.
A "title" must always be entered.
The alias is...
The alias is automatically determined based on the title. However, it can also be changed manually.
In the third field: "Upload new image" you can search your hard drive by CLICKING on "Browse". Here you can find the image you want to upload to JoomGallery.
The maximum file size is 10 MB in the default setting. The value comes from Joomla's own media configuration
You can change this in the configuration manager! (general settings -> common settings then: change "maximum size [in MB] using the "Edit" button")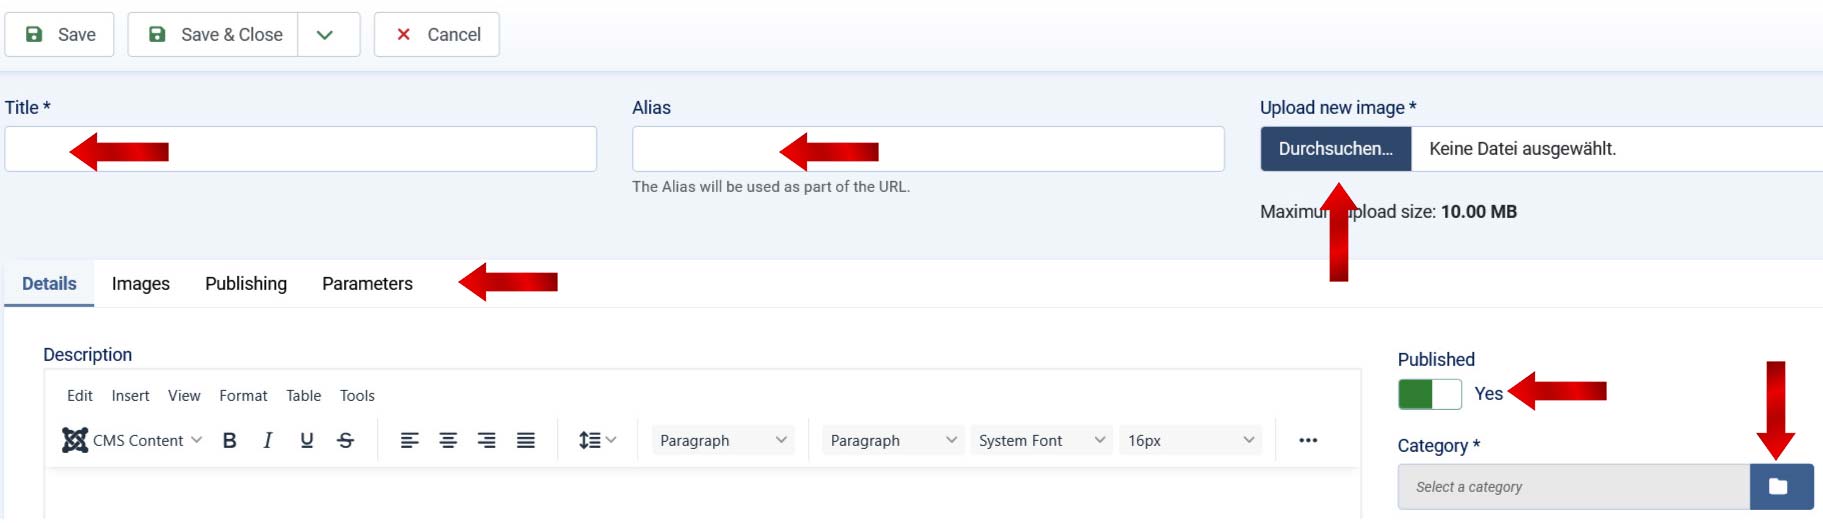
Settings under the TAB: Details:
You can create the "description" again and explain things about the image for you as information, but it is not mandatory. The description is not displayed on the website
On the right-hand side of the "image mask" you can "publish" the image or hide it.
The "category" point is the most important and a REQUIRED FIELD. Here you select the previously created category by clicking on the folder symbol.
You can make the image the "main image", which can lead to only such main images being displayed in other areas of the JoomGallery.
Under "Hidden" the image is either visible in the category set above in the gallery on your website or not.
(The image is still visible via a direct link. If you don't want it to be that way either, then use the "Published" option to "No")
You can also change the "access level".
Here only users registered and logged in on the website, with the various rights, can see this image.
The "Tags/Keywords" setting gives you the option of sorting the images. Here you can click on previously set tags and assign them to the image so that you can find it again later in the day.
(To find out how to set up tags, look in the documentation for tags)
Under the "Language" selection you can only activate the images for certain languages if your website offers several languages.
Settings under the TAB: Images:
After you have uploaded the image to the gallery using the "Save" button, you can see and change the three image types in the "Preview".
On the right there are things that you can enter for the image or change at any time: "Author", "Date taken" and "Image metadata". Be careful with the changes if you don't know what you are doing..
Note: The author and description of the image can also be taken from the metadata or entered. This process can be easily controlled after the first "save". Only after saving will the result be visible via the individual tabs. Further changes are possible before closing.
Settings under the TAB: Publication:
The changes to the Metadata can also be changed at any time and overwrite the data that may have been taken automatically when the image was uploaded
Settings under the TAB: Parameters:
The Watermark settings can be changed separately for each image. Here you can add or remove a watermark to specific images or, as is the original setting, determine everything globally via the configuration whether to display or not.