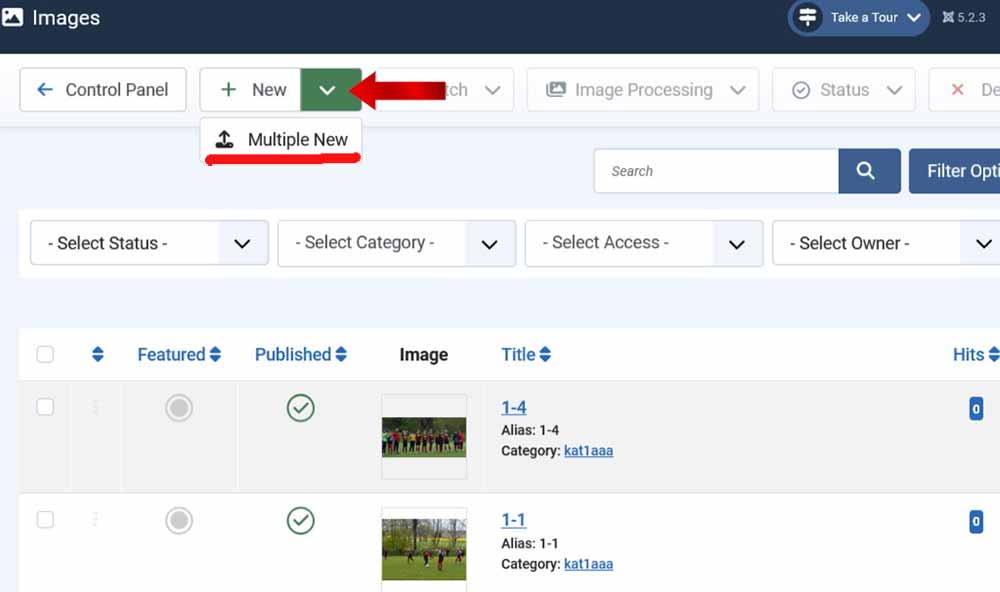
You can select "Multiple New" using the dropdown button under "New".
This gives you the option of uploading many images to the JoomGallery at the same time.
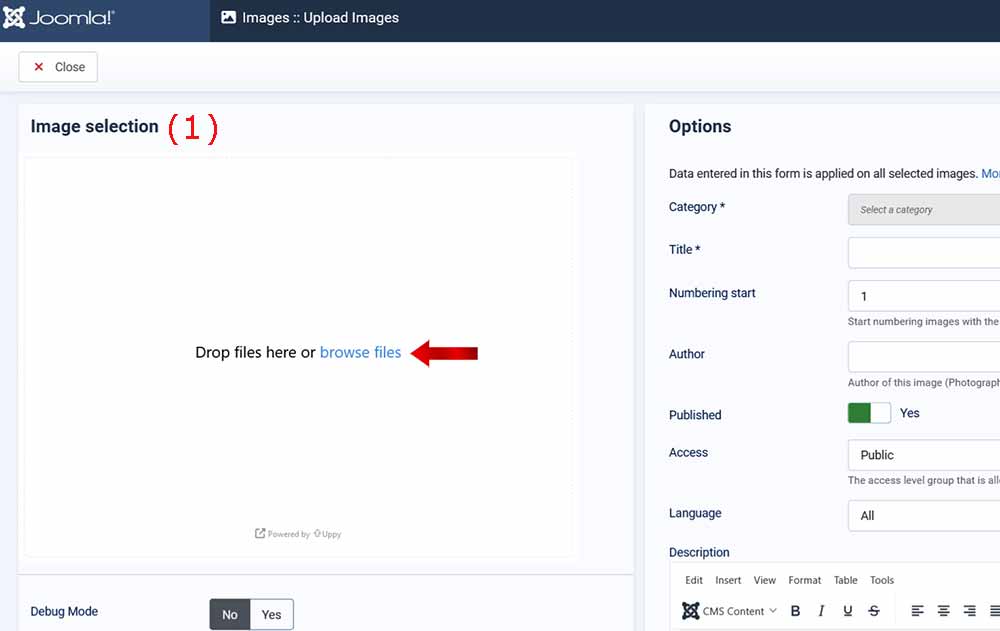
You will now be taken to the "Upload form to upload many images to JoomGallery 4 at the same time.
In this form you will see a large field on the left-hand side "Image selection". [1]
First option: There you first click on "browse files" text. A window will now open and you can click on the images on your hard drive that you want to upload to JG 4.
The second option to get images into this window is via "drag and drop".
To do this, simply mark the images you want to upload from a folder on your PC and drag them, with the left mouse button pressed, directly into this field!
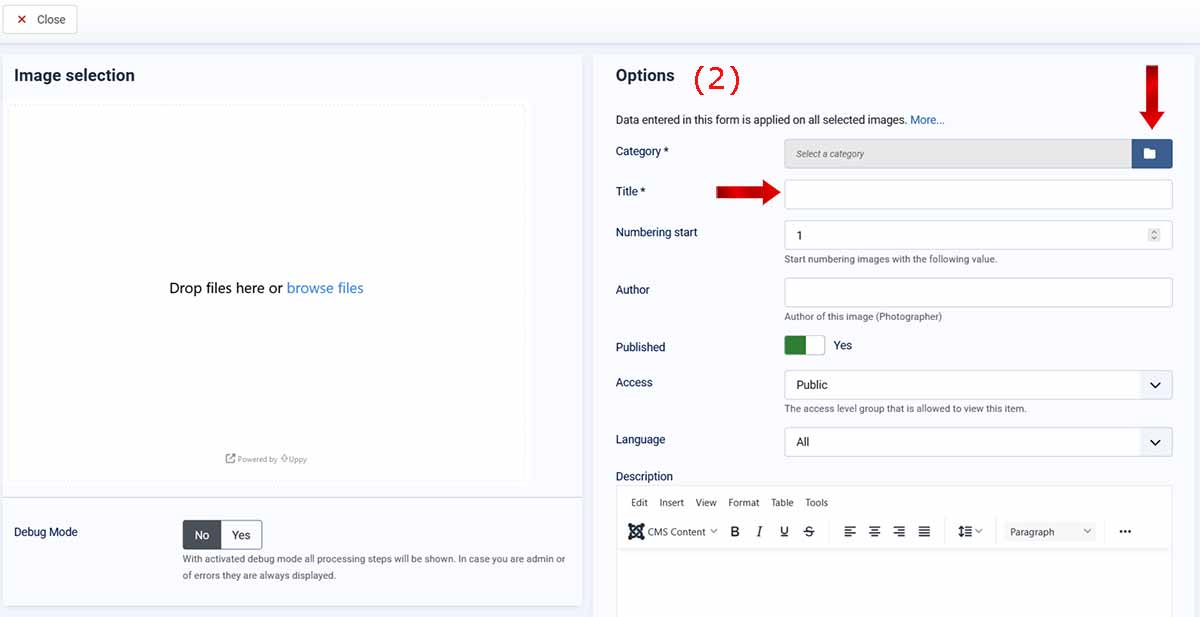
When you see the images you want in this window, go to the right-hand side in the "OPTION" area (2). Depending on the settings in the JoomGallery configuration, there are different options for setting up before uploading. Here we explain the options as they appear after installing JoomGallery 4, without changes to the configuration. (Status from JG 4 Beta1 - December 2024 may look different today)
In thisoptions field there are the following things that always count centrally for all images that you upload:
Under "Category" you can select the desired categories that were previously created under the menu item "Category". To do this, simply click on the small, white folder symbol. The category selection is a required field (marked with a: "*")
The "Title" is the future "name" of the images, and is also a required field.
The "Numbering Start" field indicates the number that is added to the end of your "Title" to make the image unique. Example: Holiday-1 or if you set 100 in the selection, the first image will be called: Holiday-100.
The "Author" field indicates the person who uploaded the images to JoomGallery or an owner...
The "Published" option is self-explanatory. With the setting/slider "YES" or "NO", the image in the category will be public or not. This setting can be changed later for each image.
The "Access level" allows you to choose as a default which registered and logged in Joomla users can see the images. The "Public" setting makes them visible to everyone.
The "Language" field only appears if you have a multilingual site.
In the "Description" field, as almost always, you can enter something important to you.
After these general settings, let's now go back to the left side of the form.
Here you can again set three personalized things for each image in the "Image selection" (1) by clicking on the "pen symbol".
Title, description and author can be changed or overwritten separately, unlike the general settings. This only applies to this one image. If you have changed something, don't forget to press the "SAVE CHANGES" button. Or click "Cancel" to discard it without saving.
In the lower left area there is the field: "DEBUG MODE", if you set the switch to "Yes" you can read important information to help you if there are any errors during upload. Normally the button can remain on "No".
You can finish and start uploading the images with the green "UPLOAD files" button.
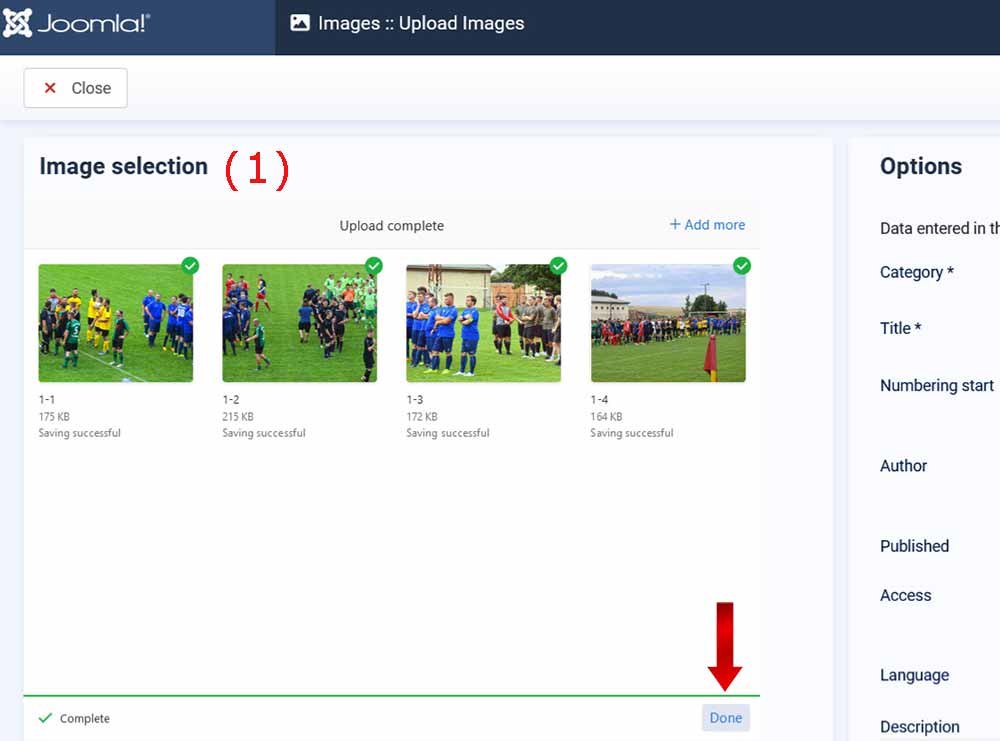
If that worked, you can now upload more images to the JoomGallery in exactly the same way.
To do this, first use the small "Done" button that appears at the bottom right after the upload and start again with the upload settings...