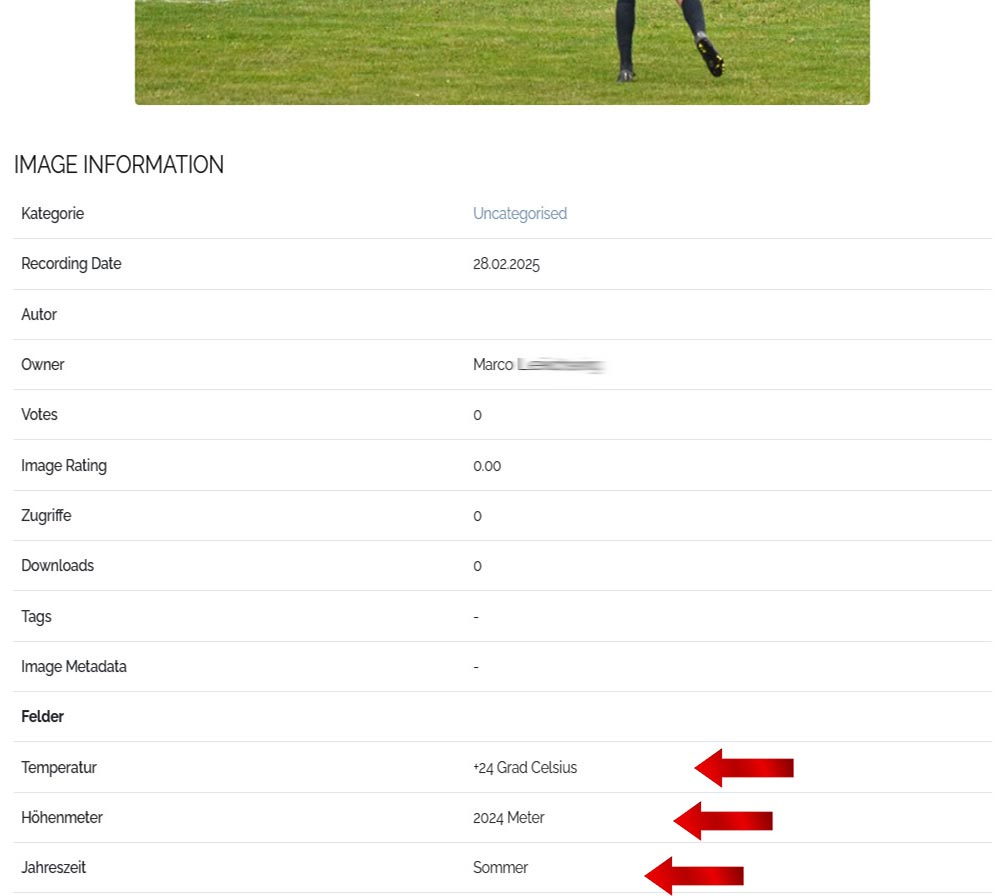
Introduction:
Since Joomla! version 3.7, fields (or custom fields) have been part of Joomla's core extensions.
JoomGallery 4.x also offers the option of creating new fields and field groups specifically for our component.
The "fields" are configurable fields that can be used in images or categories for all kinds of information. If used correctly, new and custom information can be displayed.
In total, Joomla! 15 different field types are available (e.g., calendar field, checkbox, text field, color picker, SQL field, media field, user, and many more).
Create Fields
First, you should create one or more field groups. -> see here
Now you can create one or more "fields" one after the other, one at a time, and assign them later.
First, click on "Fields" in the left admin menu in the JoomGallery component. As with field groups, the "+ New" field is located at the top left. Here, too, you need to check whether "Images" is selected for our new field. 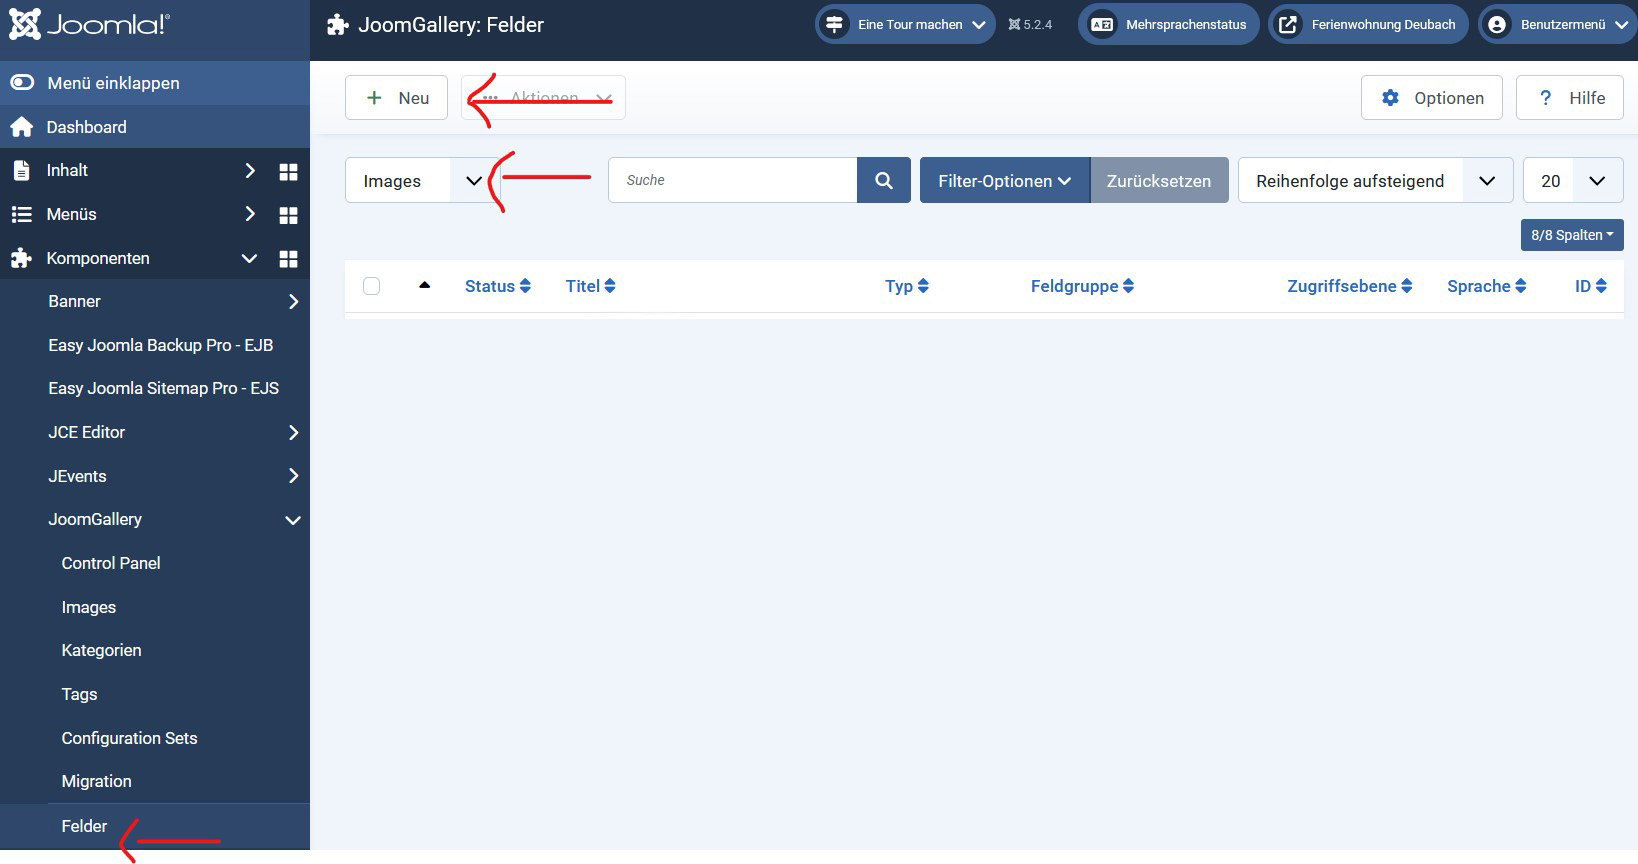
The Form
After entering the title: e.g.: "Altitude" or "Season," or "Temperature," etc., the field type must be specified.
After selecting the desired field type, the corresponding parameter fields are generated. For our case, the type "TEXT(text)" is sufficient.
(Further information about the different field types in Joomla can be found here...)
Further information follows, such as the name, label, and the option to make this field mandatory. Most of this can also be changed later.
Brief explanation of the "GENERAL" tab:
* The "Label" is visible in the frontend!
* The "Default Value" is used to ensure that a predefined value/text is entered if nothing is entered into the field later.
* "Filter": Joomla checks for certain things whether the subsequent entry into a field can be correct. e.g.: If I set the filter to "Phone Number," saving an image in this field with text entered would not be saved. They must be numbers, such as a phone number.
Short explanation of the "OPTIONS" tab:
* The "Placeholder" setting is used to add a kind of explanation for the field in light gray as a hint. If you type something into the field, this text disappears.
* With "Label" of the field you can display it or not (Label is assigned in the General tab)
This makes sense for some things, but sometimes you don't want to show the label in the frontend. You can change that here...
* "Prefix and Suffix" are there to define default values. Example: You always want to put the "€" sign after the input. Then you enter the euro sign under Suffix. The person editing the field no longer has to do this. If you want to permanently enter something before the field value, use Prefix.
On the right side you have the option to assign the field to a specific field group. In our case, it must be assigned to the field group: "Conditions." Clicking the "Save and Close" button will apply everything again. 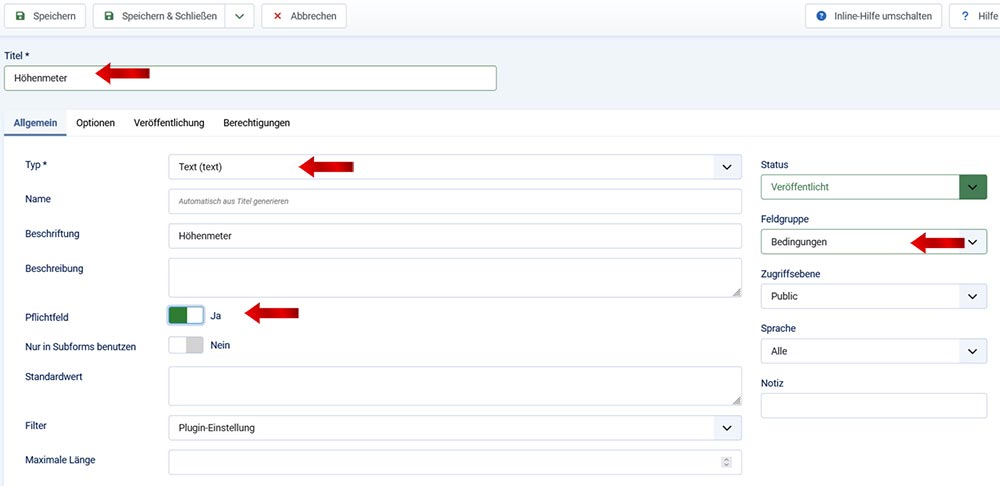
Add fields to an image (single image view)
At the time of writing, you could only add fields to existing images or use the single upload mode for newly uploaded images. This wasn't possible in multi-upload mode.
So we go to the JG 4 menu item "Images" and select "+ NEW" to upload a new image to our gallery. Load.
We assume that you have already created field groups and fields.
A new tab, "Conditions," now appears in the input mask. In addition to the upload process you are already familiar with (see "Upload an image" below), you can now fill in your newly created fields for the image you are uploading. To do this, click on the new "Conditions" tab. In our case, we see three things that can be entered:
1. Temperature
2. Altitude
3. Season
You can now enter the desired parameters, e.g., for temperature = "15 degrees Celsius" or for altitude: "2006 meters" or for season: "Spring".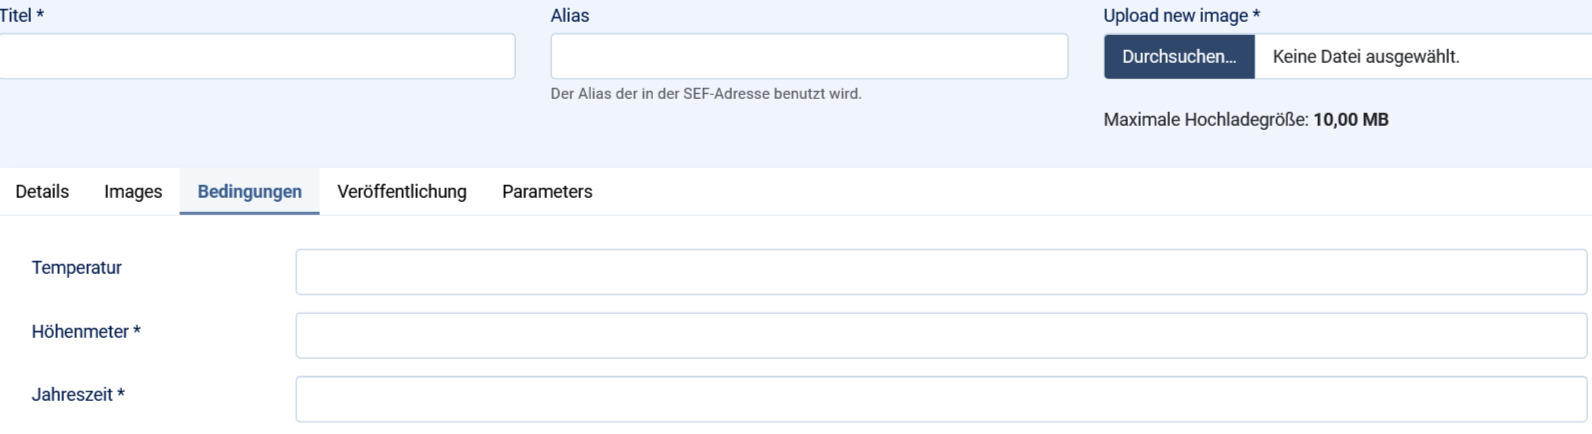
Once you have entered all the other important information for uploading the image, the data can be imported again using the "Save and Close" button at the top left.
ATTENTION: An asterisk "*" in the field name means that it is mandatory; otherwise, if the field is left blank, it cannot be saved.
You could select this setting when creating the field (e.g., altitude). I did this for two of the three fields in my example.
Result:
View in the frontend (single image view)
To see the result, select your image in the frontend.
Currently, the data is only visible in the single image view.
(You can also edit images already uploaded to JoomGallery with your "fields" at any time.)